Locksmith Training | Locksmith Course | Locksmith Courses | Locksmith School | Locksmith apprentice | Train to be a locksmith | Learn Locksmithing | Training Courses in locksmithing | Locksmith | Northeast | Locksmith Training Northeast | Locksmith Training Yorkshire | Locksmith Training Midlands | Locksmith Training Scotland | Locksmith Training Newcastle | Locksmith Training in the UK | Best Locksmith Training | Award winning locksmith training | Courses | on the job training | Locksmith business | Gateshead Locksmith Training | Locksmith in Gateshead | Middlesbrough | Sunderland | Durham | Northumberland | Liverpool | Manchester | Nottingham | Master Locksmith
GATESHEAD LOCKSMITH TRAINING - TAYLORS LOCKSMITH ACADEMY - LOCK ACADEMY
Tel: +44(0)7525639943 Email office@taylorslocksmiths.co.uk
Locksmith Training and Business Development Northeast England


.png)


Learn to become a locksmith | Northeast | UK | Training
PART 1 - WOOD DOOR SECTION
Wooden Doors, Mortise and Night Latch Introduction and Reality!
Welcome to the wooden door, Mortice and night latch section where we will cover all the most common issues related to wooden doors. I have created a simple introduction video that highlights some of the most common issues we see, the types of jobs we do NOT see many of. This is to try and prevent you the student from rushing out and buying lots of tools you will never use such as decoders, pick sets, 2 in 1 picks etc.
Good Luck and if you have any questions, then just ask!
Below you will find the ERA Expert PDF download that really breaks down the types of locks found on wooden doors. The PDF also goes further into euro profile, mechanisms and more!
Live Job - Turned Curtain Wheel with Failed Spring!
In this live job Steve received a phone call from a ladies daughter. She advised on the phone a wood door, waist high lock, handles do not lift to lock and that the key hole was blocked as she could not see through it. This indicated to Steve that the curtain wheel had turned and was blocking the key way.
This can be caused by a number of issues. 1 wrong key placed in the lock and turned which fires the curtain wheel. 2 an attempted pick to enter, such as a criminal attack. 3 The spring has failed and the curtain is free moving. 4 The right key is placed in the lock but nit far enough inside when it turned and this allows the curtain to turn, this also shows a weak spring.
Upon arrival we found out this was the case, a weak spring and the right key. After firing it back it felt extremely loose which means the spring retention had failed meaning could easily turn and do it again. We booked the client in for our our locksmith to attend and replace the lock. Total made on this job came to £120 for all the work to carried out. As you can see it was a cash payment and a very happy customer.
This job was priced up at £45 emergency for getting the customer out of the house. Normally this would be between £55 - £110 then a return visit at £45 and then £30 for a new lock and keys.
About the Mortice Lock
A mortise lock is a lock that requires a pocket—the mortise—to be cut into the edge of the door or piece of furniture into which the lock is to be fitted
A mortise lock (also spelled mortice lock in British English) is a lock that requires a pocket—the mortise—to be cut into the edge of the door or piece of furniture into which the lock is to be fitted. In most parts of the world, mortise locks are found on older buildings constructed before the advent of bored cylindrical locks, but they have recently become more common in commercial and upmarket residential construction in the United States. They are widely used in domestic properties of all ages in Europe.

he term 'mortice lock' is commonly misused to determine a specific type of lock - when in fact there are many types of mortice lock, as the term itself determines that the lock is morticed into the door, rather than surface-mounted or clamped like other types of locks may be.
The principle types of mortice locks are mortice sash-locks and mortice dead-locks.
Sashlocks work with a set of handles and a key, so the door can be held closed on the latch and optionally locked via key, whilst deadlocks only work from a key, meaning they would not hold the door closed unless locked.

Dead Lock
Mortice Dead Locks can only be operated with a key. Dead Locks have a single bolt that secures into the door frame and offers extra strength. Dead locks offer exceptional security and are specified by..

Mortice Sash Locks require both a key and a handle to operate the lock. The handle operates the latch element of the sash lock, whilst the key operates the dead lock.
Sash Lock

Escape Locks
Escape locks provide a means by which to secure your premises from the outside with a lock, yet allow free escape from inside the building in the event of an emergency. These often have a thumb turn euro profile lock fitted
Mortice Lock History
Mortise locks have been used as part of door hardware systems in America since the second quarter of the eighteenth century. In these early forms, the mortise lock mechanism was combined with a pull to open the unlocked door. Eventually, pulls were replaced by knobs.
Until the mid-nineteenth century, mortise locks were only used in the most formal rooms in the most expensive houses. Other rooms used box locks, or rim locks, in which, unlike in mortise locks, the latch itself is in a self-contained unit that is applied to the outside of the door. Rim locks have been used in the United States since the early eighteenth century. A rim lock has the lock body and bolt mechanism on the outside of the door, unlike a mortise lock, where the bolt is inside the door.
An early example of the use of mortise locks in conjunction with rim locks in one house comes from Thomas Jefferson's Monticello. In 1805, Jefferson wrote to his joiner listing the locks he required for his home. While closets received rim locks, Jefferson ordered twenty-six mortise locks for use in the principal rooms. Depictions of available mortise lock hardware, including not only lock mechanisms themselves but also escutcheon plates and door pulls, were widely available in the early nineteenth century in trade catalogues. However, the locks were still expensive and difficult to obtain at this time. Jefferson ordered his locks from Paris. Similarly, mortise locks were used in primary rooms in 1819 at Decatur House in Washington, D.C. while rim locks were used in closets and other secondary spaces.
The mortise locks used at Monticello were warded locks. The name warded locks refers to the lock mechanism, while the name mortise lock refers to the bolt location. Warded locks contain a series of static obstructions, or wards, within the lock box; only a key with cut outs to match the obstructions will be able to turn freely in the lock and open the latch.
Warded locks were used in Europe throughout the medieval period and up until early 19th century. Three British locksmiths, Robert Barron, Joseph Bramah, and Jeremiah Chubb, all played a role in creating modern lever tumbler locks. Chubb's lock was patented in 1818. Again, the name refers to the lock mechanism, so a lock can be both a mortise lock and a lever tumbler lock. In the modern lever tumbler lock, the key moves a series of levers that allow the bolt to move in the door.
The next major innovation to mortise lock mechanisms came in 1865. Linus Yale, Jr.'s pin tumbler mortise cylinder lock put not only the latch or bolt itself inside the door, but also the tumblers and the bolt mechanism. Up to this point, the lock mechanism was always on the outside of the door regardless of the bolt location. This innovation allowed keys to be shorter as they no longer had to reach all the way through a door. Pin tumbler locks are still the most common kind of mortise lock used today.
In the UK the final exit door into the real world from a property must conform to BS3621. This is a lock standard by the British Standards Institute (BSI) If the lock has this mark, then it’s safe to get it for a front or a back door of a residential Property!.
BSI and Fire Door Ratings Information!
The most common locks you will find on wooden doors are a either a mortice lock or a latch based lock such as a night latch which we will cover later in this section.
Where mortice locks are provided for fire doors, the cut-out in the door should be the minimum necessary to prevent any voids which fire can penetrate. After the edges, the mortice lock and latch areas represent the next zone of weakness. Filling the voids in the cut-out with intumescent paste will markedly lessen the weakness in this area.
As the latch is the only holding device on the closing edge of most fire doors it is important that it should be strong and that the nib of the latch should engage into the latch plate at least 12mm to ensure that the closing edge will not spring open when the door deforms. Extended flap latch plates are advisable for 60 minute fire doors.
Plastics and aluminium handles and knobs will be destroyed on the fire side but this may not have a serious effect on the integrity of the door if steel spindles are provided.
The lock or latch should be CE marked to BS EN 12209: 2016 or BS EN 1634 or preferably, should be provided with additional product certification by an approved third-party certification body.
The mortice lock is broken down in to the following categories:

Multi-part Document
BS EN 1634 - Fire resistance and smoke control tests for door, shutter and openable window assemblies and elements of building hardware
https://doi.org/10.3403/BSEN1634
This is a multi-part document divided into the following parts:
It is a criminal offence to supply products that do not comply with the UK Construction Products Regulations. For fire door fittings intended for use against fire, markings will be the easiest method to demonstrate compliance. The Building Control Officer or other approved inspectors or a Trading Standards Officer, however, will require proof of this compliance. Across the UK construction industry and in Europe, construction products are being tested to new EN Standards to ensure that fire safety and performance requirements are met in future building projects. Door hardware will eventually have 21 new EN Standards. For many ironmongery items you will need to ensure that only marked products are used on all fire doors, smoke control doors and escape doors.
Inside The Mortise Lock and How It Works!
In the following videos above you will find what's inside of the most common British Standard lock in the UK, the Era 5 Lever Mortise Sash lock that costs around £14.50 at trade, pre the pandemic it cost £8.50. The lock retails from £35 to the public. The following videos show the security features.
The Difference Between a Deadlock and a Sash Lock
The deadlock has a single deadbolt and no handles, often is a back set of 2.5 or 3 inch
The Sash lock has a deadbolt and a latch lock, this lock uses a handle and key to open.

Lever Locks in Depth
This has to be on of the most in depth videos on lever locks at 1 hour long by Paul from Locks in the City. Its a heavy video that explains all the types of levers from H levers to open ended and shows one of the most difficult locks to pick!
Luckily for us we really only see single sides H levers and open ended! But you should always know about them!
Most Common Issues We See with Wooden Door Locks!
As a locksmith we have what we actually do and what the TV thinks we do and what the people who want to make money by selling tools makes you think you will need! Well I am here to highlight the most common jobs that we see as locksmiths.
As you will see, we have the 10 most common mortice lock jobs we see, and #10 is a lost key. This means that if you were to buy every lock ick set, decoder set and spend £1000s on mortise lock tools so you can gain entry, you would soon realise that all of them tools are obsolete as the most common issues we see are
#1 a lock change: this means the door is open, landlord or customer has the keys, they just need the lock replacing or upgrading for insurance reasons. I would charge £55 per hour labour, £35 for a new lock. It should take about 20 - 40 minutes to complete.
#2 Slipped curtain wheel: this means the owner has possibly placed the wrong key in the keyway or the right key but not all the way in the keyway. Often only the key tip has entered the lock and s they turn the key it activates the curtain wheel. Sometimes the curtain wheel spring can become lose or slack and the curtain wheel may move jus by vibration of the door closing. To identify this issue, look through the key hole or get the caller to look through the key hole. If its blocked you know this is generally the case. Simply slip it back into place. I would charge £55 per hour labour and recommend a new lock at £35. It should take about 20 - 40 minutes to complete.
#3 The latch has disconnected: This can be a common issue, basically there is a small nib on the back of the latch that the spindle driver will connect to, the nib can become so worn that the latch spring fires it into the door frame, but cant be pulled back via the handle. To gain entry you must latch the door using a latch tool or mica. The key will still work as normal for the dead bolt. If you cant gain entry via a latch tool then remove the handles, remove some would within the handle area and locate the latch, manually pull this back. I would charge £55 per hour labour, £35 for a new lock. It should take about 40 - 1.5 hours to complete.
#4 Bolt throw tail has broken: When the curtain wheel turns a small nib pulls back the bolt, sometimes the nib on the curtain can ware off or the bolt tail can snap off due to use. The latch will work if it has one but the key will just spin in the keyway. To resolve this issue, you must turn the key half way to lift the levers which will clear the lever packs and allow you to manually pull the bolt back. If you can see the bolt via a gap in the door frame then try and pull it back via a small screwdriver. Sometimes we may need to create a dimple in the bolt by drilling a small section and pull the bolt back that way. We can also do a technical entry and pull the bolt back using that method. I would charge £55 per hour labour, £35 for a new lock. It should take about 1 hour - 1.5 hours to complete.
#5 Dropped Lever, jammed lock: When this happens it means that a lever or multiple levers have dropped down, often the lever spring can snap, the levers then drop down and no key can open the lock. The lock is dead locked. Only method of entry is a technical entry. I would charge £55 per hour labour, £35 for a new lock. It should take about 2 hours complete.
#6 Key is in the back of the door: It is as it sounds, the client has left the property and a key has been left in the back of the door. This can happen when a client has left via an electronic garage and someone is left the key in the front door and it has a night latch and mortice lock, someone may have left via the garage door or could be inside a sleep or dead and you need to gain entry. For whatever reason you need to perform a key turn and unlock the door. I would charge £55 per hour labour, about 2 minutes to complete.
#7 Lock Clean and Service: This can be also a lock change, the lock is becoming sticky, hard to operate and needs to be serviced and cleaned, sometimes the door may have warped or dropped and the keep may need to be moved. I would charge £55 per hour labour, £35 for a new lock. It should take about 1 hour to complete.
#8 Key snapped in the lock: Its simple, the key has snapped in the lock, they normally have a spare key but its hard to operate and the key is hamming. We would clear out the broken bit of key and service the lock. I would charge £55 per hour labour, It should take about 1 hour complete.
#9 Change the lock for a thumb turn mortice cylinder lock: The door is open, it needs the lock removing and replacing with a thumb turn mortice and cylinder. This can be the case on HMO properties. I would charge £55 per hour labour, £30 for a new mortice lock and £35 for a new cylinder It should take about 2 hours complete.
#10 Lost Key: Finally we arrive at a issue you can use your lock picks or decoder on! Well, kind of. Actually more than likely not at all. The reason being this: 1 - you need to be able to identify the lock. This is really hard and often you will need many manuals of ID charts to be able to cover all locks in the UK. These manuals cost around £50 plus each and there is hundreds of them. Later you can see there is an app that may also help nut again its expensive. 2 - Once identified you will need the exact tool for the job, again there are as many tools as locks. Think of it like a car. Lets look at Ford, you need a lock pick for the Ford Fiesta, a pick for the Ford Zetec, a pick for the focus, a pick for every model that's ever been made and often times multiple types as you may only be able to open generation one of that style lock and need a generation 2, 3, 4 or whatever pick and gauge.. This means you needs hundreds of tools, many gauge types, many lever pick types etc. By the time you identify the lock, find the right tools and the start picking probably to fail you will be leaving the customer in the cold and angry. It is one of the slowest methods of entry. However picks and decoders do have there place. Such as if you fitted the lock, you only fit Era Fortress Sash and Deadlocks to your doors then having that set of picks and decoder can help as you know the lock. But we teach the technical entry method when all else fails, this is how we gain entry to every lock. I would charge £55 per hour labour, £35 for a new lock. It should take about 2 - 3 hours to complete.
Conclusion: So as you can see, only 1 in 10 mortice lock jobs we actually pick or decode. When we add other wooden door jobs such as night latch fails, night latch lock outs etc it becomes 1 in every 20 jobs and wooden door jobs are 1 in every 10 locksmith jobs with 9 other jobs being UPVC, composite etc. That means 1 job each week will be a wooden door and it would probably be a lock change. So to find a lock that has a lost key can be rare, often 1 job in every 6 - 8 months. However that's based on my area that I operate which is Gateshead, Newcastle and Sunderland. This has a mix of wooden, UPVC, Composite and metal doors. Now if you were to workout the cost of the tools vs the amount of times a you were able to use them you would see that it would take decades to make your money back making it a waste of money and time.
Assignment: Download the PDF on single point locks, ERA Expert Papers
Assignment: Download the How The Mortice Lock Works Papers
Assignment: Disassemble and assemble, take apart the Era Fortress SashLock, learn about its insides, then place it all back together again and make sure it's working.
Assignment: Download the fire rated codes PDF.
Explain what BSEN1634 is?
Q, All dedicated fire doors, other than those to locked cupboards and service ducts, should be fitted with?
Q, What is a latched door?
Q, What is an unlatched door?
Q, What is a door selector? Explain how it works, explain what it should be fitted on?
Q, Hinges and latches have an important role in ensuring the integrity of the door. The fire door hinges must remain adequately attached, in spite of the charring of wood in the vicinity. It is common to use three hinges although tests have shown that with some doors two hinges may be adequate for a 30 minute fire door. What are these hinges?
Q, In order to provide an effective barrier to a fully developed fire, a door has to remain closed within the frame. In the case of single action doorsets, this role might be fulfilled by a latch. Where the latch does not perform this role, there is a need for a lock to be fitted. This might be on a duct door which is normally kept locked with only occasional access to service equipment, or doors to cupboards which for security reasons are locked for periods of time. Where security is in conflict with easy egress, consultation with the regulatory authority or fire officer should be made in order to reach a satisfactory solution. Sometimes a turn operated lock might suffice whilst in other cases specialist devices are available that can reduce this conflict to a minimum, such as? Name the 2 BS EN codes of 2008?
Q, In fitting locks or latches to fire-resisting doorsets, the potential fire performance of a doorset can be reduced due to?
Q, What is intumescent paste and how is it used? How much does it cost? Where can you buy it?
Q, How far must a latch enter the frame, 6mm, 10mm 12mm or 22mm?
Q, Should you fit a letter box to a fire rated door?
Find all the info here https://www.firesafe.org.uk/fire-door-fitting-and-ironmongery/
Assignment Show and Tell: Show me how a mortice lock works, demonstrate your knowledge of the part names and explain it to me through show and tell. I want to see each part of the lock explained:
-
How it works
-
What it does
-
What is a security feature
-
Sizing of the lock
-
Type of lock, 5 lever BS3621 mortice sash lock etc.
-
Show me the security rating and explain this rating.
-
Explain the rating for fire doors and what it's called?
PART 2 - KEY WAYS, KEY TURNING
In this section Steve deals with all mortice locks, latch locks, night latches, from the tools used to work on wooden doors to picking the locks, fitting the locks and everything else related to wooden door along with a look at composite doors. Steve will go over some of the many issues related to failed mortice locks along with making tools on the job, over lifting to how mortice locks work, how latches work along with many entry methods used. Common issues related to the lock and even pricing of the jobs.
In this video Steve picks a 5 lever dead lock, shows why the option of picking is not always the best option for dealing locked out mortise jobs along with issues of dealing false
sets and gates, curtain wheels and levers.
Through the videos Steve will show many ways to enter mortise locks and the best way to attack them for locksmiths. Picking is fine if your a lock sport lock picker but when your on the clock and time is ticking, spending 3 hours picking is not the right way to go.
By the time you complete this section you should know every method of mortise lock entry, all styles of mortise lock and how they work, what inside a mortise lock and common problems locksmiths face along with night latches, bypassing them to taking them apart and fitting them.
Mortice Try Out Keys for 2 and 3 Lever Locks
Mortise try out keys are a handy tool but only work on 2 and 3 lever locks which you can come across in the UK mostly on internal doors as neither the 2 or 3 lever mortice lock is British Standard which means by law it cannot be fitted to a final exit door of a home of business as it will break the terms of insurance laid out by the insurance underwriters which can result in insurance fraud or even the locksmith been held liable for any loss due to the insurance been invalidated.
Mortice try out keys can now be bought on Amazon or ebay but watch out for cheap flimsy sets. You will get 19 keys to a 3 lever set and the 2 lever is a much smaller set.
Always look through the key way on a job like this to make sure you dealing with a 2, 3 or 5 lever lock.
Practice as much as you can with these keys and remember the higher the key fits in the key way the better chance that key will open the lock.
Key Turning in a 3 Lever Lock
In this video we look at key turning on a 3 lever lock using different methods and issues. Many burgles use this method to gain entry. You should never leave a key in the back of any lock.
Key Turning a 5 Lever British Standard Lock
In this video Steve attacks a lock with the key in the back of the lock using a flat edge screw driver to use the customers own key to open the door. This is why you do not leave a key in the back of the door.
PART 3 - MORTISE LOCK TECHNICAL ENTRY
Mortice Lock Incision Entry
In this video we allow a student for the first time to preform a mortice lock incision entry on a extremely high security mortice lock with anti drill plates, anti drill pins, anti cut bar and pins, anti pick wheel.
The student will struggle as we wanted to show you the real side of dealing with this kind of mortice entry.
Can you find an easier way?
A, Yes you can but its costly. You can use a decoder set which is around £220 -£250 each and each set only works on a limited number of mortice locks and with hundreds if not thousands of variants currently operating in the UK it makes these other methods some of the hardest to achieve entry for a new locksmith. This is die to the locksmith having to identify the lock via the key hole. Once identified you will know how o attack the lock. Sounds easy right? Your very wrong and it can be a costly error!
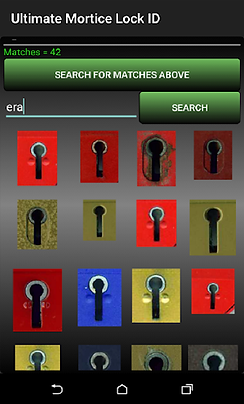
Basicly when you arive at a door you will need to note certin features, colour of details of the lock. We call this lock forensics. You will then search manuals or even apps looking for the colour of the lock. As you can see on this screen shot from an app. You can get an idead of what we may see
through a key hole such as the curtain, the dimples, key hole length, shape, the colour, if we can see the anti drill plate or how close the key hole is t the bottom of the lock case or how high it is to the anti drill plate. We have to look at all aspects and search through manuals or apps to find such information. The manuals can be a quite expensive and vast. At one point we have over 20 manuals, some where as thick as 5 inches.
However today you can find apps that can help, but once again at a cost. Now the other aspect which many over look is that normally on a lock out its dark, cold, raining, snowing etc, road noise, drunk people and so many factors that can effect your performance and concentration. So to make sure that we have as many ways to get from A to B we need to know the many routes. The one in the video above is a foundational way that anyone can achieve entry with simple none expensive tools and manuals.
Some Questions and Answers
Question: Can you drill a mortice lock?
Answer: Yes you can, however its not recommended for new locksmiths, it can be costly if you slip off the anti drill pins in the bolt through and mangle the levers. You normally use multiple drill bits as it eats your drills.
Question: Can you pick a mortice lock?
Answer: Yes, definitely and its much fun, however it has some draw backs. Today picking mortice locks is more geared towards lock sport as a hobby as its dam hard, many years of practice is needed to get good enough to do it on a job. We have to take in to account the weather, feeling in your fingers, knees, traffic sounds and feel. This style of picking is all about feel and sound. Its also very expensive with multi picks cost £160 - £220 each and your normal need one for each brand then more for different models or at least other parts at the cost of £60 each for many add ones.
Assignment: Download the Mortice ID Manual PDF and read and watch all the content in this section. https://manualcerrajero.com/wp-content/uploads/2019/04/morticemanual.pdf
Assignment: Jump to part 5 and watch the video on making a tension tool based on a cut down key! Take a mortice key and file or cut most of the key bitting off and make a tension tool from it to turn the curtain. See the how to video section on making a mortise tension key. (Tip: you want enough of the key bitting to turn the curtain and catch the bolt but not enough that it interferes with the levers).
You will need: a length of wood, around 5 to 6 inches wide, around 1 inch thick. You will want a length of this wood to make jigs along with wood screws.
How to make a jig: Take 2 lengths of wood, 10 inch long x 1 and 15 inch long x 1, 6 inch wide by 2 inch thick. The longer piece of wood will be left longer so it can camp in the vice to allow you to work on the jig. Next place both bits of wood over the lock to sandwich the lock in place. Mark out the lock area and shape. Then screw the wood together with screws above and below the lock. Remember to drill out a keyhole, make it as neat and tidy as possible as you will do this on real doors. This is done by using 2 different size drills, measure the keyhole top for either 6mm, 8mm, or 10mm drill bit then the lower section of the keyway is either a 4mm or 6mm size. Drill out the keyway then do the same for the spindle hole. Next go online and find a set of handles for a mortise sash lock that fits the lock you have. This is important as later in the job you will have to locate and source parts, measure the locks and figure out if they will work for the client. You don't need to buy them, just find the measurements and draw them in the wood. This will create your working area as we work 5mm in from the edge of the handles at all times unless we have to drill outside of this area, then we will use wood filler to fill any drill holes.
Video Assignment: place the mortice lock in the jig, make sure you can see the latch reversal screw to make sure your on the right side of the mortice lock, the latch reversal screw side has a hidden map behind the anti drill plate to tell us where to drill to lit the lever pack. If you do this backwards it's twice as difficult but something you can practice later. Now perform a skilled surgical entry:
1, make a chiseled out entry point in the wood
2, attack the anti drill plate and remove the anti drill plate (Tip: if you make an indent above the drill plate it should create a lip to get a screw driver behind. Often I use a small flat head to get the plate to lift slightly but I don't use force. Once I have a gap I then place a larger screwdriver behind the plate and pop the welds)
3, locate the lock map, then locate the lever pin that keeps the levers in place. You won't be able to see this but you will have an idea where it is. Opposite this lever pin you will find the bolt throw. Make 3 x 6mm drill holes side by side so it can make one oblong shaped drill hole that you can work within.
4, place the tension key in the key way and find the tension point.
5, Now pick the lever stack to allow the bolt throw to to pull back
6, open up the lock,
7, then replace the wood back in the whole using a wood filler. You must take the wood out in a lump if possible as it needs to go back into the hole on a customer's door to make it secure again.
When we create a course like this we need to work on the most direct rout from, A to B. However as you can well imagine we have many ways of getting from A to B, we have easy rout, best for your economy, the difficult rout, a dangerous route and a scenic rout. All have different fuel costs and obstacles along the way. My job is to fully explain the foundation of the mortice lock, its levers, bolt, bolt throw, curtain wheels and its body, its levels of security, dangers and what's the most economical for our locksmith based business. However you have to decide going forward what to study next. This is why I have created this section as I know many locksmiths that want to go that extra mile and who have a larger bank account and can afford to buy all the alternative rout tools such as Mortice Lock
PART 4 - DECODING
Decoders from GJ Locks tools at around £220 each. I have included a link to GJ locks website which offer these tools. Now these tools are not available by anyone else, they are made only by this company in the UK. Often they have waiting lists for there tools and they can be hard to come by. This is why its not always an option for many locksmiths who are new to the industry.
The video to the right is a Highley sort after tool. Its a decoder that allows the user to quickly decode and open the ERA Fortress, Union Strong bolt and New Yale British Standard 5 lever locks. The decoder works by quickly and efficiently measuring the rear heels of the levers to determine the key code. Opening times of 2 minutes are easily achievable with minimal practice. This tool will decode and open the following locks, ERA Fortress Deadlock and Sashlock. Union Strongbolt 2100, 2105, 2200, 2205. Yale PM562, PM560, PM552, PM550 as of June 2019 This is now in its second generation and differs from the original tool in appearance and function.
To access this tool you wil need to be accepted by GJ locks by filling in a form. Here is the link
In this above video by GJ locks they show there Multi Pick tool that's used for picking mortice lever locks. This tools can be found on the GJ website.
In this video a chap explores the use of a Mortice Lock Identification style app to be used to identify the mortice lock to figure out the best course of action or attack to open the lock.
In this video a chap shows how to drill out a bolt throw using a simple home made template for thus style of lock. This lock has no security features. Locksmith them are extremely hard to enter.
Quite often wooden doors can be a real pain, each one is never the same. Back in the day we could simply drill out the bolt throw but today's bolt throws have anti drill pins and this can make a job twice as hard. One of the hardest to deal with is a wooden door with a metal skin, if you cant pick the lock then you need to pull out the big guns and even look at cutting out the metal, you are problem solver so you look at ways of getting into each door, we cant make a video for every aspect of the job, sometimes you need to think on your feet and just get the job done, take the easy and hard together.
Once you have watched each video you can then take our wooden door test. This test will test your knowledge and how much you are taking in about mortice locks, rym cylinder locks and night latches. Click Here to take the test or wait till the end of this course and test your skills, you can take the tests multiple times.
Assignment: research mortice lock decoders, learn about deciding tools, how they are used and why they are used. Look at pricing if you can. Are decoder tools locksmith only tools? Write a short section with the information you find.
Assignment: Present a paper on the following questions!
-
Mortice lock decoding and what is it?
-
How to decode a lock?
-
Cost and time, identity based issues related to decoding, what's your thoughts?
-
Decoders only work when a key would work! Is this correct?
-
How much are lock decoders?
-
How many decoders are there on the UK market for sale?
-
How much would you have to spend to buy all lock decoders?
-
Why do we no longer drill out mortice locks?
Assignment: learn about mortice lock drilling by doing online research, watch a few different videos on the subject, see what information you can find out about mortice lock drilling that may be relevant and make notes as I will want to hear what you found out..

Night Latch Drill Bypass
To bypass the night latch using a drill can be a common way of gaining entrance to a wood door where it can't be shimmed using and bypass tools, can't be picked or whatever the issues may be.
How to: Simply, you drill inline with the latch keep in the door frame from the outside of the property. I use a 6mm drill bit or a 8 to 10mm wood bit for a larger screwdriver. You place a flat edge screwdriver inside the drill hole and push the latch back into the nightlatch body opening the door. You can see the drill point on the image. NOTE: The inside of the latch is normally hollow and against the wood frame. If not use a metal drill bit.
The Objective: The Objective is to push the latch back into the body of the night latch system.
NOTE: This will not work on a DEADLOCKED night latch. Only if you cant get a shim in the frame to bypass the latch.
PART 5 - Mortice Lock Picking & Lifting
Mortice lock picking is certainly not one of the easier sides of locksmithing and today we are blessed with multiple ways to enter a mortice lock as you have now seen. However every locksmith worth his salt should be able to pick the mortice, weather its a 2, 3, or 5 lever lock depends on your skill and dedication to the practice and the art of lock picking.
Here are a few videos I have found on the subject which may aid you in further research.
Beginners Guide
How to Make Your Pick Wires
Making Pick Wires
Making Tension Tools
Multi Pick Tool Sets
2 in 1 Lever Lock Picks
Our thoughts on these style tools!
First of lets address lock picking as a locksmith. Our aim is different to a hoby picker who may buy many tools and play with them as thats there hobby but for a locksmith its about business. For instance I would not buy or use 2 in 1 picks as I have 3 lever try out keys to open such locks or I would make a simple lifting set on the job. Some locksmiths have larger bank accounts than others and may love tools and buy them all. There is no right or wrong way to get from A to B on a job. It's about what works best for you. Some may go the old school route and attack the mortice via removal of the anti drill plate, other may drill holes, some may decode, others will pick or lft. The choice is yours!
Our aim is to give you as much information n each subject so you can chose your own path and learn from our foundation.
Good luck on your journey into mortice locks.!
Video Assignment: make a pick wires using the piano wire supplied, watch the videos on how to make pick wires. Practice picking the 5 lever lock without any pick cover. (Note: mortice lock picking is one of the hardest things to learn, it's easy in principle but it's hard on the job site. If you can pick it. Place the lock in a freezer for 5 hours then place the lock outside at night then pick it outside. The lock must be normal lock hight, you will be n your knees and see how you get on in real world conditions.)
Assignment: research lever lock picking, see what else you can find out in the world. Look at pick tools such as 2 in 1 picks, curtain pick sets.
Assignment: no more than 2000 words on making the tools required to pick mortice locks and how to use them. Other tools, how they are used and what you found in your research.
PART 6 - 3 Lever Picking & Over Lifters, Pre Lifters & Warded Locks!
3 Lever Lock Picking and Over Lifting
This is part 5 of a 5 part series on lever lock picking by the Lock Noob which can be found on YouTube. He will cover types and terms, lever padlocks, non-curtained mortice lever locks, curtained lever locks and specialised techniques including overlifting, pre-lifting and tryout keys. The best size picks for overlifting are made from 0.8mm piano wire. Its around £3.50 for a pack of wire. You can buy Piano wire here!

A Lever Tumbler Lock (Lever Lock)
A lever tumbler lock is a type of lock that uses a set of levers to prevent the bolt from moving in the lock. In the simplest form of these, lifting the tumbler above a certain height will allow the bolt to slide past.
The number of levers may vary, but is usually an odd number for a lock that can be opened from each side of the door in order to provide symmetry. A minimum number of levers may be specified to provide an anticipated level of security (see five-lever locks section).
"Double acting" lever tumbler locks were invented in 1778 by Robert Barron of England. These required the lever to be lifted to a certain height by having a slot cut in the lever, so lifting the lever too far was as bad as not lifting the lever far enough. This type of lock is still used today, on doors in Europe, Africa, South America and some other parts of the world.
The lock is made up of levers (usually made out of non-ferrous metals). Each lever needs to be lifted to a specific height by the key in order for the locking bolt to move. Typically, the belly of the lever is cut away to various depths to provide different combinations, or the gate is cut in a different location, to provide differs. A lever will have pockets (or gates) through which the bolt stump (or post or fence) moves during unlocking.
There has not always been universal agreement about which variants of the basic design merit the terms "lever lock" or "detainer lock" or both. Some authors use the term "detainer lock" to refer specifically to variants where the gates are "open" (i.e. at the edge of the lever), rather than "closed" (i.e. entirely surrounded by the lever).
Lever locks generally use a bitted key. Some locks used on safes use a double-bitted key, as do some door locks of a type often used in Southern and Eastern Europe.
Three-lever locks
A three-lever lock is a common type of lever lock, but is generally used for low security applications such as internal doors as their tolerances are much lower (there are fewer combinations of key available, so they are likely to unlock doors they shouldn't).
Five-lever locks
A five-lever lock is often required for home insurance and often recommended by the police for home security. There are various grades but the current British Standard (BS3621:2007) is usually required for insurance purposes. Locksmith Valerie Olifent notes that, "The doors of many historic churches still carry an old wooden lock although often you find that a modern 5-lever mortice lock has been installed alongside it to meet insurance requirements." BS3621:2007 requires a bolt throw of 20 mm rather than the 14 mm of the earlier British Standard.
Most BS3621 locks have anti-pick devices built in to reduce the chance of lock picking, along with hardened bolts and anti-drill plates to reduce risk of physical attack along with anti drill pins in the bolt throw.
Warded Locks
A warded lock (also called a ward lock) is a type of lock that uses a set of obstructions, or wards, to prevent the lock from opening unless the correct key is inserted. The correct key has notches or slots corresponding to the obstructions in the lock, allowing it to rotate freely inside the lock.

The warded lock is one of the oldest lock designs which can be found as far back as ancient China and Rome. During the Middle Ages they were used prolifically on monasteries where, because money and time were not issues, their complexity grew. Warded locks are still in use today in the UK and Ireland for low security applications, and on heritage sites such as ancient monuments and churches to preserve original features, with primary security being provided by other means such as a lever lock mechanism installed alongside.
In a basic warded lock, a set of obstructions, often consisting of concentric plates protruding outwards, blocks the rotation of a key not designed for that lock. Warded locks may have one simple ward, or many intricate wards with bends and complex protrusions; the principle remains the same. Unless the notches or slots in the key correspond to the wards in the lock, the key will strike an obstruction and will not turn.
Additionally, a series of grooves on either side of the key's blade limit the type of lock the key can slide into. As the key slides into the lock through the keyway, the wards align with the grooves in the key's profile to allow or deny entry into the lock cylinder. Although this is not commonly recognized when discussing warded locks, it is more applicable to current locksmithing applications such as pin-tumbler or wafer-tumbler locks.
In double sided locks (meaning locks where the key can be inserted from either side of the door) the centre of the key shaft is solid and protrudes past the end of the bit which slots into a hole on the opposite side of the lock. Double sided ward locks nearly always have perfectly symmetrical bits. For single sided locks a cylindrical post is typically located in the center of the lock. Its purpose is to provide a point of leverage for rotating the key, and to help correctly align the key with the wards. The key has a corresponding hole which fits over the post.
When the correct key is inserted, it will clear the wards and rotate about the center post. The key may then strike a lever, activating a latch or sliding bolt, or it may itself push against the latch or bolt. In a double acting lever lock, the key may additionally push against a spring-loaded lever which holds the sliding bolt in place.
Due to the design of the lock, a well designed skeleton key can be made to bypass the wards. For this reason warded lock mechanisms are generally used in low security applications. There are also a very limited number of unique keys that can be created, so many keys will be able to open other doors that they were not designed to open.
The invention of the lever tumbler lock solves this problem, as each lever is required to be lifted to a certain height in order to operate the locking mechanism.
Assignment: Simply read and study all the content in this section, make yourself aware of these locks, the idea of how to deal with them. Also know that we very rarely pick a 3 lever, we use 3 lever try out keys. We also do NOT see warded locks, these were mostly over 100 years ago but they are around. If you wish you can try and pick a 3 lever and make pick wires. You would need to buy 0.5mm piano wire from Amazon. This Is a good skill to learn, to know where to buy the wire and size for making future picks.
PART 7 - Mortice Jigs, Joinery
Joinery Tools and Gear
The following videos show the kinds of tools a chippy or joiner may use. However not all tools are required and you may find you never use them as you may never fit locks to wood doors depending the area you live. If you live in Farringdon Sunderland the you will see that over 96% of the properties in that area are all multi point locking doors. We do recommend you wait at least 6 month before rushing out to buy these types of tools as you may never ever use them. However you will knw the kind of area you live in and f you have woodend doors. Also bare in mined we are emergency workers and not joiners. A chippy will charge £25 per hour vs a locksmith that charges £55 per hour. For this reason locksmiths do not actually fit that many wooden door locks from scratch. However its a good skill to learn and practice.
This very precise drilling jig is designed specifically to guide the drilling bit to cut mortices for door locks and their face plates. It is quick and simple to set up, self centring and locks onto the door edge securely. It really is a simple process: mark the lock length on to the door, select the width of mortice cutter that suits your lock, set the depth collar, pass the drill shaft through the jig's guide bush, lock the jig to the door and using power from your drill, drive the carbide tipped mortice cutter into the door moving up and down; repeat process for the faceplate. This produces a very clean smooth cut and is one of the fastest most accurate ways to cut a mortice. You can also use it to cut hinges. Power drill with a 13mm chuck running at speeds 2,000 - 3,000 rpm is recommended. Supplied with 3 special carbide tipped cutters, 19, 22 and 25mm covering the most popular lock widths, shaft for lock up to 100mm in depth and carry case. Click here to learn more
The RYOBI Wood/Metal Door Lock Installation Kit is as easy as 1-2-3! The AUTO-STRIKE LOCATOR aligns the template bracket with the strike plate to ensure accuracy every time and all without measuring. All you have to do is set, drill, and install. It includes everything you need to install deadbolts or locksets in wood or metal doors. You can find out more here
-
AUTO-STRIKE LOCATOR aligns door lock bracket with strike plate for perfect door lock placement.
-
Automatically centers and keeps hole saws in line for accuracy
-
Kit is ideal for installing deadbolts and locksets
-
Dual backset adjustment for both standard backset locations
Basics of Wood Work, Joinery
Fitting The Night Latch and Mortice Lock
Above you can find 3 videos on what we do in our trade, that is fitting the rim cylinder lock, fitting the mortise lock with simple how to sections that you should watch and study and the put into practice the assignment below.
Assignment: I want you to use the skills shown and make a butt joint basic frame as a mini door frame. I then want you to make a mini door and hang the door with at least 2 hinges. I want you to then fit a night latch. and make a interchangeable door that holds a mortice lock.
Assignment 2: Complete the course on Udemy on wood working.


Above in a diagram 1 you can see the night latch in a basic jig, its basically a mini door with 2 hinges just like your living room door or bedroom door. In diagram 2 you can see the butt joint frame and if you have watched the videos on making door frames and joint. Then you should understand the simple diagram.
The 3rd diagram is a more simplistic version with outside hinges. This is a easier version to create. However I am not looking for easy I am looking for you to put your best foot forward. Them that slack in life, won't do well in the business world as you have to work hard. If you try and take shortcuts here, then you will probably do the same in the business and it has a very good chance of failing!!
So do yourself a favour, try hard, work harder and make it happen. It may just be a wood frame and door but it could also be a metaphor for your life in general. Did you make your mark on this world and really achieve or did you just become a sheep and plod along? In business you can't be the sheep. You have to be the wolf and that wolf is always hustling, always working, it is always working out how to put more food on its families table. Don't be the sheep! Don't be the food!
Congratulations you have ended the wood section. Next up is the business side of the course.
PART 8 - NIGHT LATCHES


The internal working parts of the night latch system.
Latch Frame: This is a welded metal bar the size of the internal part of the lock, its what the spring attaches to and move back and forth.
Spring: The spring is stretched out to fit the topand the bottom of the latch frame. This is what can fail and snap and leave the latch stuck out. It often happens when the snib is pushed down to DEADLOCK the night latch.
Snib: The snib is the switch that you can move to lock the latch back inside of the night latch body or deadlock the night latch closed to prevent entry with a key or pick or bypass. The snib can be accidently locked into position by slamming the door too hard leaving a person locked out!

How to FIX the issue: Simply remove the latch from the door if possible by unscrewing it and replace it. If your locked out, no pick will work better than the key and that wont work as the door is DEADLOCKED . It cant be bypassed even if you drilled the lock or drilled the keep and pshed the bolt back. Its physically fired and jammed. The only way past this is brut force.
Other Latch Locks That Can Be Bypassed!


Above you can see 3 styles of lock, they all look to have a high level of security, even complicated. However they are a simple latch lock that can be either bypassed of picked and bypassed.
Video Assignment: Removal of latch lock from an internal door such as a living room door, learn how it works, see if you can move the latch by using the top or bottom of the lock, is there a sprung trigger that works the latch lock? Often you will find at the top of the internal door latches a small area that we can connect a screwdriver to and move the spindle driver and pull it back to pull the latch back into the small case.Then put it back together.
Assignment 2: research latch lock bypass tools, learn about them and list them and their uses. Create a written theory on latch lock bypass, common issues, what if a key wont work, how do you gain entry? Look at letterbox entry tools and decide if that's a tool you may want to add in the future. Pros and cons of the letterbox tool?
Video Assignment 3: Practice latching all your doors you can find using mica and the latch tools, this can be internal doors such as bedroom, bathroom doors etc. If you can find a property with a latch lock on, then please latch a main door.
Mortice Lock Drilling
-
Why, we don't drill mortise locks anymore, BS3621 2007, anti drill pins and issues?
-
Tools used to drill a mortice lock, drill tip size 5mm - 6mm, drill, templates, identification manuals. (link to manual or more information) https://www.lasm.co.uk/2012/04/30/basic-bs3621-mortice-lock-identification-hints-and-tips/
-
How to drill a mortice lock, types of drills used, drill cards, manuals
Video Assignment, record the assignment in parts, this is a long assignment: Mortice Lock Drilling (Warning this will kill the lock) Make sure the lock is in the jig. If you have not made a jig then make one, it can be as simple as 2 bits of wood sandwiching the lock just like a door skin. You will perform the drilling through the wood. Also go online and find the measurements for a set of mortice handles and mark out the handle size on the wood. You must stay within these lines. If you do not stay within the handles lines, then I would want to see you drill out the lock, then fix the drill point in the wood using fillers etc This is important as sometimes we have to attack a dead lock and it has no handles so we have to repair the wood entry point. Now, measure the location of the bolt throw and mark it on the wood, then drill out a mortice lock in a jig and pull the bolt back with a tension key..
(Tip: Normally we would need to find the measurements of the bolt throw by looking at a vast number of manuals and trying to identify the drill point. However for this exercise you can simply measure up from the top of the key hole until you inline with the bolt throw, then measure from the bolt throw in a locked position back to the first measurement from the keyhole. This should give you the exact pin point to drill out the bolt throw)